
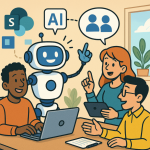
Microsoft continues to expand the power of AI across the Microsoft 365 ecosystem, and Copilot in SharePoint is no exception. One of the newest additions to this toolset is SharePoint Copilot Agents—a powerful way to automate content generation, personalize sites, and provide intelligent, task-specific assistance within your SharePoint environment.
In this blog post, we’ll walk through:
- What SharePoint Copilot Agents are
- How to configure and use them
- How to create your own custom agents
Let’s dive in!
🤖 What Are SharePoint Copilot Agents?
Copilot Agents in SharePoint are AI-powered assistants designed to perform specific roles or tasks within a SharePoint site. These agents extend the capabilities of Microsoft Copilot by allowing organizations to:
- Automate repetitive content tasks (e.g., site page creation)
- Answer questions based on site content
- Guide users through processes or policies
- Generate summaries or reports based on document libraries
They use the power of Microsoft Graph, SharePoint Framework (SPFx), and Azure OpenAI, and are tightly integrated with Microsoft Syntex, Power Platform, and Loop components for broader contextual understanding.
🛠️ How to Configure SharePoint Copilot Agents
Before you create custom agents, ensure your environment is ready:
✅ Prerequisites
- A Microsoft 365 E3/E5 or SharePoint Advanced Management license
- Administrator or Site Owner permissions
- Copilot enabled for Microsoft 365
- Access to Microsoft Syntex (for content processing tasks)
🔧 Step-by-Step Setup
- Enable Copilot for SharePoint
Admins can enable Copilot via the Microsoft 365 Admin Center or PowerShell using theSet-SPOTenantcmdlet. powershellCopyEditSet-SPOTenant -EnableAICopilot $true - Enable Agents in a Site Collection
Navigate to Site Settings > Copilot Agents (Preview) and toggle the feature on. - Assign Roles and Permissions
Copilot Agents require specific permissions to access site content, so ensure they have the correct Graph API permissions via Azure AD.
✨ Using Built-in Copilot Agents
Microsoft includes several out-of-the-box agents for SharePoint, such as:
- Page Creator: Automatically generates site pages from templates or user prompts
- Document Summarizer: Summarizes long documents in libraries
- Q&A Agent: Answers user questions based on site content and context
To use them:
- Go to a SharePoint site
- Click the Copilot button in the command bar
- Select an agent from the prompt window (e.g., “Summarize document”, “Create a new policy page”)
- Interact with the agent using natural language
🧠 Creating Custom SharePoint Copilot Agents
To build your own agent, you’ll typically use a combination of Power Platform (Power Virtual Agents), SPFx Extensions, and optionally Azure OpenAI.
Option 1: Power Virtual Agents + SharePoint
- Go to Power Virtual Agents (https://powervirtualagents.microsoft.com)
- Create a new chatbot and connect it to SharePoint using Power Automate flows
- Use Dataverse, custom connectors, or Graph API to access and respond with SharePoint content
- Deploy it to your SharePoint site via SPFx or as a web part
Option 2: SPFx Custom Agent with Azure OpenAI
For advanced scenarios:
- Create an SPFx Web Part or Extension that interfaces with Azure OpenAI
- Use context from the current site (e.g., metadata, list items) as input to the model
- Display results inline on SharePoint pages
Sample SPFx interaction snippet:
typescriptCopyEditconst response = await fetch("https://your-openai-endpoint", {
  method: "POST",
  headers: { "Authorization": "Bearer TOKEN" },
  body: JSON.stringify({ prompt: userPrompt, context: currentSiteData })
});
const result = await response.json();
this.displayOutput(result.text);
🧩 Tips for Effective Agent Design
- Start small: Create agents for specific, repetitive tasks like page generation or document classification
- Design with security in mind: Always validate permissions and scope Graph API calls
- Focus on user experience: Ensure responses are helpful, contextual, and non-intrusive
- Iterate: Collect feedback from site users and refine prompts or logic accordingly
Extra posts:
 The Future of SharePoint AI, Agents, and Smarter Collaboration (2025 Update)
  How to Use Microsoft’s AI Builder or Power Virtual Agents to Configure a Chatbot
  Getting Started with SharePoint Online for Collaboration
  Introduction to SharePoint Agents AI-Powered Automation for Smarter Workflows
  Configure Tenant-Level Sharing Settings for SharePoint and OneDrive
  The “Agentic” Intranet: Securing and Scaling M365 Copilot with SharePoint & Teams