Microsoft Azure is one of the most powerful and widely used cloud computing platforms in the world today. It is trusted by startups, enterprises, developers, students, and IT professionals for building applications, managing data, running virtual machines, and experimenting with artificial intelligence. If you are new to cloud computing or simply want to test Azure’s features before investing money, Microsoft offers an excellent free account option.
With a free Microsoft Azure account, you can access many popular cloud services at no cost, along with a generous $200 free credit to use within your first 30 days. This makes Azure an ideal platform for learning, testing, and building small projects without financial risk.
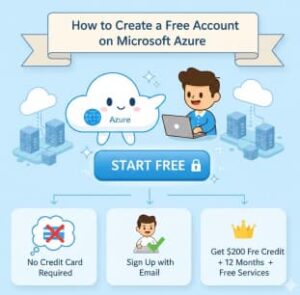
In this detailed guide, we’ll walk you through how to create a free Microsoft Azure account step by step, explain what you get with the free tier, and share tips on how to make the most of it.
Why Choose Microsoft Azure?
Before diving into the signup process, it’s important to understand why Azure is worth exploring. Microsoft Azure provides:
- A global network of data centers
- Powerful virtual machines and storage solutions
- Tools for web development, mobile apps, and APIs
- Advanced AI, machine learning, and analytics services
- Enterprise-grade security and compliance
Whether you’re a student learning cloud skills, a developer testing applications, or a business evaluating cloud solutions, Azure offers flexibility and scalability to meet your needs.
Step 1: Visit the Official Microsoft Azure Website
To begin, open your web browser and go to the official Microsoft Azure website:

Once the homepage loads, look for the “Start free” or “Free account” button. This button is usually prominently displayed on the homepage. Click on it to begin the registration process.
Make sure you are on the official Microsoft website to avoid scams or fake signup pages.

Step 2: Sign In Using a Microsoft Account
To create a free Azure account, you must sign in with a Microsoft account. This can be:
- Outlook.com email
- Hotmail.com email
- Live.com email
If you already have a Microsoft account, simply enter your email and password to sign in.
If you do not have a Microsoft account, don’t worry. Click on “Create one!” and follow the on-screen instructions. You will be asked to provide an email address, create a password, and verify your identity.
Creating a Microsoft account is free and only takes a few minutes.
Step 3: Enter Personal and Contact Information
After signing in, Microsoft will ask you to provide some basic personal and contact details. This information helps Microsoft set up your account correctly and comply with regional regulations.
You’ll be asked to enter:
- Full name
- Email address
- Phone number
- Country or region
- Organization name (optional)
Once you enter your phone number, Microsoft will send a verification code via SMS or call. Enter this code to confirm your identity.
This step ensures that real users are signing up and helps prevent misuse of the free credits.
Step 4: Verify Your Identity Using a Credit or Debit Card
To protect against fraud, Microsoft requires a valid credit or debit card to verify your identity. This is one of the most common concerns for new users, but it’s important to understand how it works.
Key things to know:
- You will not be charged automatically
- Microsoft may perform a small temporary authorization (usually refunded)
- You are only charged if you manually upgrade to a paid plan
Enter your card details carefully and proceed. This step confirms that you are a genuine user and helps Microsoft prevent abuse of the free tier.
Step 5: Review Terms and Complete Registration
The final step is to review Microsoft’s terms and conditions. Take a moment to read through the agreement, then accept the terms to complete your registration.
Once the process is finished, your free Microsoft Azure account will be activated, and you will be redirected to the Azure portal.
Congratulations! 🎉 You now have access to one of the world’s most powerful cloud platforms.
What Do You Get with a Free Microsoft Azure Account?
Microsoft’s free Azure account offers impressive value, especially for beginners.
1. $200 Free Credit (30 Days)
You receive $200 in free credit, which you can use within the first 30 days. This credit can be spent on most Azure services, including virtual machines, databases, storage, and AI tools.
2. 12 Months of Popular Free Services
You also get access to select services free for 12 months, such as:
- 750 hours of Linux or Windows virtual machines
- 5 GB of Blob Storage
- Azure SQL Database (up to 250 GB)
- Managed Disks and bandwidth
3. 25+ Always Free Services
Even after the 12 months expire, you can still use more than 25 services that are always free, including:
- Azure Functions
- App Services
- Azure DevOps
- Static Web Apps
This makes Azure ideal for long-term learning and experimentation.
What Can You Do After Creating Your Azure Free Account?
Once your account is active, you can start exploring Azure right away. Some popular things beginners try include:
- Creating and managing virtual machines
- Hosting a website or web application
- Building APIs and backend services
- Experimenting with AI and machine learning models
- Storing and analyzing data in the cloud
Azure’s dashboard also allows you to monitor usage and costs so you can stay within the free limits.
Tips to Avoid Unexpected Charges
To ensure you don’t accidentally spend money:
- Set up spending alerts in the Azure portal
- Regularly monitor your usage
- Delete unused resources
- Stay within free tier limits
Azure gives you full control, so you only pay when you choose to.
Creating a free Microsoft Azure account is one of the best ways to learn cloud computing without any upfront cost. With $200 in free credits, 12 months of free services, and many always-free options, Azure provides an excellent environment for experimentation, learning, and development.
Whether you’re a student, developer, or business owner, Azure’s free account lets you explore cutting-edge cloud technology at your own pace. Follow the steps in this guide, and you’ll be up and running on Microsoft Azure in no time.
If you decide Azure meets your needs, you can easily upgrade to a pay-as-you-go plan later — but until then, enjoy learning and building for free!
Extra posts:
 What Is Microsoft Azure? A Beginner’s Guide to the Azure Ecosystem
  Machine Learning in Azure A Beginner’s Guide to Building Intelligent Solutions
  A Complete Guide to Azure Database Migration Strategies, Tools, and Best Practices
  Azure Language Studio: A Complete Guide to Features, Use Cases, and Technical Setup
  Azure Free Tier & Cost Management Learn Azure Without Spending a Dime
  Free Up Disk Space with Storage Sense & Disk Cleanup in Windows 11 A Complete Guide