
Migrating to Microsoft 365 can be a game-changer for businesses looking to enhance collaboration, security, and productivity. To simplify this transition, Microsoft offers the Microsoft 365 Migration Tool, a powerful solution designed to help organizations move their data from on-premises or other cloud services to Microsoft 365 efficiently. In this blog, we’ll explore how to use this tool for a smooth migration process.
Why Use the Microsoft 365 Migration Tool?
The Microsoft 365 Migration Tool provides several benefits, including:
- Seamless Data Transfer: Move emails, files, and settings with minimal downtime.
- Automated Processes: Reduces manual intervention with built-in automation.
- Security & Compliance: Ensures data integrity and compliance with Microsoft’s security standards.
- Supports Multiple Sources: Migrate from Exchange, Google Workspace, and IMAP-based email services.
Pre-Migration Checklist
Before starting the migration, ensure the following:
- Assess Current Environment: Identify the data sources, email services, and storage requirements.
- Backup Critical Data: Always create a backup to prevent data loss during migration.
- Check Licensing: Ensure your Microsoft 365 subscription supports migration.
- Enable Modern Authentication: This is required for secure data transfers.
- Review DNS & Mail Flow Settings: To avoid disruptions, update necessary records after migration.
Step-by-Step Migration Process
Step 1: Access the Microsoft 365 Migration Tool
- Sign in to the Microsoft 365 admin center.
- Navigate to Setup > Data Migration.
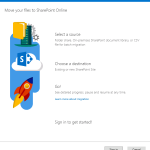
- Choose the source from which you’re migrating (e.g., Google Workspace, Exchange, IMAP, etc.).
Step 2: Connect to Your Source Email System
- Select the type of migration (e.g., cutover, staged, or hybrid).
- Provide necessary credentials for the source system.
- The tool will verify access and scan available mailboxes for migration.
Step 3: Configure Migration Settings
- Select the mailboxes or files to migrate.
- Define migration batch settings (batch size, priority users, etc.).
- Set up scheduling to migrate during off-peak hours to minimize impact.
Step 4: Start the Migration Process
- Initiate the migration and monitor progress from the admin center.
- Review error logs to resolve any failed migrations.
- Once completed, verify data integrity and ensure all emails, contacts, and files are transferred.
Step 5: Update DNS & Finalize Migration
- Update MX records to point to Microsoft 365 for mail flow.
- Test email delivery and application access.
- Decommission old servers if no longer needed.
- Inform users about the successful migration and provide necessary training.
Post-Migration Best Practices
- Verify Data: Ensure all emails, files, and settings are intact.
- Educate Users: Train employees on using Microsoft 365 apps effectively.
- Optimize Security: Enable multi-factor authentication (MFA) and conditional access policies.
- Monitor Performance: Use Microsoft 365 reporting tools to track system performance.
Troubleshooting Common Issues
- Migration Stuck or Slow: Check bandwidth, adjust batch sizes, and verify network settings.
- Authentication Errors: Ensure modern authentication is enabled.
- Data Discrepancies: Re-run migration batches for incomplete transfers.
Extra posts:
 Microsoft SharePoint Migration Tool now supports SharePoint Server 2010 available
  A Complete Guide to Azure Database Migration Strategies, Tools, and Best Practices
  A Complete Guide to Microsoft 365 Administrator Roles Free SharePoint Migration tool to SharePoint Online and Office 365
  Microsoft Teams Rooms Complete Guide
  How to Archive Conversations in Microsoft Teams: A Complete Practical Guide