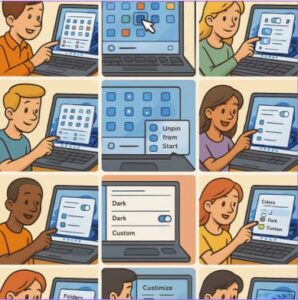
The Start menu is the heart of your Windows 11 experience. It’s where you access apps, documents, and system tools, all within a single click. Microsoft redesigned the Start menu for a cleaner and more modern layout, but that doesn’t mean you can’t make it your own. Whether you prefer minimalism, productivity, or aesthetics, here are 10 ways to customize the Start menu in Windows 11.
1. Pin and Unpin Apps for Quick Access
One of the easiest and most effective ways to personalize your Start menu is to decide which apps deserve the spotlight.
- To pin an app: Right-click it from the All apps list and select Pin to Start.
- To remove an app: Right-click a pinned tile and choose Unpin from Start.
This gives you quick access to your most-used applications, saving time and reducing clutter. Think of the Start menu as your personal “command center.” Keep only what you use daily, such as your browser, email client, and work tools.
2. Rearrange Pins and Create App Groups
After pinning your favorite apps, you can easily organize them. Simply click and drag to rearrange the icons in any order. You can even drag one app onto another to create a folder group—perfect for keeping related apps together, such as “Work Tools” or “Entertainment.”
This kind of organization makes your Start menu more efficient and intuitive. Grouping also helps you avoid endless scrolling or searching for apps in the list.
Tip: Give each folder a meaningful name that helps you find things faster.
3. Choose What Appears in the Start Menu
Windows 11 lets you control what extra content appears below your pinned apps. Navigate to:
Settings → Personalization → Start
Here, you’ll find options like:
- Show recently added apps
- Show most used apps
- Show recently opened items
If you prefer a cleaner, minimalist look, you can toggle off these options. This makes the Start menu feel lighter and more focused on the essentials.
4. Add Useful Folders Next to the Power Button
The Start menu includes a small Power icon for shutting down or restarting your PC, but you can add quick-access shortcuts to common folders right next to it.
Go to Settings → Personalization → Start → Folders and choose which folders you’d like to appear, such as Documents, Downloads, Pictures, or Network.
This feature is especially handy if you frequently access your files without wanting to open File Explorer every time.
Tip: Only enable the folders you use regularly to keep the interface tidy.
5. Align the Start Menu and Taskbar to the Left or Center
By default, Windows 11 centers the taskbar icons and the Start button. However, if you prefer the traditional left-aligned look:
- Right-click the taskbar and select Taskbar settings.
- Expand Taskbar behaviors.
- Change Taskbar alignment to Left.
This simple change can make your desktop feel more familiar—especially if you’ve been using older versions of Windows. Try both layouts to see which feels more natural to you.
6. Change the Accent Colour and Theme
Windows 11 allows deep visual customization to match your personal taste. To modify the theme or colours:
- Go to Settings → Personalization → Colors.
- Choose Light or Dark mode.
- Pick an accent colour.
- Enable Show accent colour on Start and taskbar.
This lets you create a consistent visual experience across your PC. For a sleek, modern look, choose darker tones. For something bright and lively, experiment with bold accent colours.
7. Remove or Hide the “Recommended” Section
The “Recommended” section of the Start menu shows recently opened files and newly installed apps. While useful for some, it can feel cluttered for others.
To simplify your Start menu, go to Settings → Personalization → Start and toggle off the options for showing recently added apps, most used apps, and recently opened items.
This will remove the bottom portion of the Start menu entirely, leaving only your pinned apps visible—ideal for a clean and focused workspace.
8. Export and Reuse Your Custom Start Layout
If you have multiple devices or manage several PCs, you can create one custom Start layout and reuse it elsewhere.
After customizing the layout to your liking, use the PowerShell command Export-StartLayout to create a configuration file. You can then import it on another device to replicate your Start menu setup.
This is a great option for professionals, families, or IT administrators who want consistency across devices without manually recreating the layout each time.
9. Adjust the Layout: More Pins or More Recommendations
Within the Start settings, Windows 11 offers three layout modes:
- Default: Balanced between pinned apps and recommendations
- More pins: Expands space for pinned apps
- More recommendations: Emphasizes recently opened content
If you use the Start menu primarily to launch programs, choose More pins. If you rely on it to quickly reopen recent files, select More recommendations.
Experiment with both layouts until you find what best supports your workflow.
10. Explore Third-Party Customization Tools
If you want to go beyond built-in options, there are third-party apps that allow even deeper customization of the Start menu. Some tools let you change the transparency, icon size, or even revert to the classic Windows 10-style Start menu.
However, exercise caution when using external software. Always back up your settings before making major changes, and only use trusted tools.
For most users, the built-in Windows 11 options provide plenty of flexibility without needing to install anything extra.
Customizing the Start menu in Windows 11 is about making your computer work the way you want it to. Whether you value aesthetics, speed, or simplicity, these 10 customization tips help you create a Start menu that feels natural and efficient.
From rearranging app pins to changing colours and layouts, every tweak brings you closer to a desktop experience that reflects your personality and boosts your productivity.
Take a few minutes to explore these settings—you might be surprised at how much smoother your daily workflow becomes once the Start menu is truly yours.
Extra posts:
 How to Move the Start Menu to the Left in Windows 11 (Like Windows 10 Style)
  From Start Menu to Widgets Customizing Windows 11 Like a Pro
  How to Enable and Customize Dark Mode
  Prevent Auto Start of Teams in Windows
  10 Ways Microsoft 365 Copilot Can Supercharge Your Daily Workflow