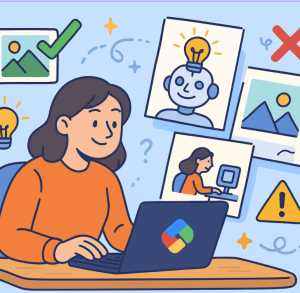
In the age of generative AI, tools like Microsoft Copilot (with its built-in image creator) give everyday users the power to turn a concept into a visual in seconds. But to get images that feel polished, useful, and aligned with your vision, you need more than just “generate image.” Below, I break down how to get great results, common obstacles, and examples you can try.
What is Copilot’s image generation?
Copilot integrates an AI image generator so you can ask it to “create an image” from prompts. It uses Microsoft Designer under the hood, powered by OpenAI’s DALL·E model, to transform text descriptions into images. The quality and utility of the output heavily depends on how you write the prompt — more detail = more control. Sometimes, image generation features may shift or be temporarily unavailable, depending on updates.
1. Start with a clear mental image (or sketch) of your goal
Before even prompting, spend a moment thinking:
- Subject / objects: What should appear (e.g. “a golden retriever puppy”, “a futuristic city skyline”, “a botanical pattern”)
- Mood / lighting / color palette: Bright and cheerful? moody and dramatic? pastel vs bold colors?
- Style / medium: Photorealism, watercolor, vector art, illustration, cartoon, cinematic, retro, minimalistic, etc.
- Composition / perspective: Wide shot? close-up? birds-eye view? Is there a focal point?
- Context or environment: Indoors? outdoors? fantasy world? futuristic lab?
- Optional references: If you have a reference image or style in mind (e.g. “in the style of Studio Ghibli” or “like classic Dutch still life”), add it to the prompt.
2. Write strong, structured prompts
The prompt is your leverage. A vague prompt gives vague results.
2.1 Be descriptive and specific
- Don’t just say “cat”. Say “a tabby cat lounging on a windowsill, morning light streaming, with potted plants around.”
- Include modifiers: “photorealistic”, “soft shadows”, “warm tones”, “cinematic lighting”, “16:9 aspect ratio”.
- You can specify what to avoid: e.g. “no text overlay,” “avoid harsh contrast,” “no extra objects in background.”
2.2 Use prompt structure / layers
One useful structure is:
[Subject / main object(s)] + [Action / position / relation] + [Environment / context] + [Style / medium / mood] + [Lighting / time / color]
For example:
“A futuristic city skyline at dusk, flying vehicles weaving between skyscrapers, neon lights glowing, in a cinematic cyberpunk style with moody blue and purple tones, soft glowing fog, wide angle.”
2.3 Use stylistic keywords, art movements, or known artists (carefully)
You can say: “inspired by impressionist brushstrokes”, “like a 35 mm film photo”, etc. But be cautious — overly generic or conflicting style keywords can confuse the model.
2.4 Iterate and refine
Start with a base prompt, inspect the results, and adjust. For example:
- If the background feels too cluttered, say “simpler background.”
- If proportions look wrong, add “realistic proportions.”
3. Leverage Copilot / Designer features
Here are features and tips specific to Copilot / Designer:
- Go to the Create > Create an image section and type your description, or add a reference image to guide the style.
- Choose a size (aspect ratio) when generating.
- Use brand kits or preset themes to maintain consistency if available.
- After generating, refine or re-prompt based on what you want changed.
- In Word or other Office apps, you can also insert images directly via Copilot.
4. Common pitfalls & how to avoid them
| Problem | Why it happens | How to fix |
|---|---|---|
| The image is blurry, low detail | Prompt too vague | Add detail, request “high resolution” |
| Unwanted random objects or clutter | Model overfills to satisfy “scene” | Ask “minimal background” or “no extraneous objects” |
| Styles clash / look confusing | Too many conflicting style keywords | Use fewer, clearer style directions |
| Weird anatomy or proportions | AI struggles with complex shapes | Add “realistic proportions” or refine with reference |
| Prompt ignored or parts missing | Model focuses on strongest cues | Emphasize important elements clearly |
| Image not appearing | Service limits or temporary issues | Retry later or use the Designer interface |
5. Example prompts & experiments you can try
Here are a few example prompts you can test:
- Prompt A (simple):
“A red apple on a wooden table, soft morning light.”
- Prompt B (detailed):
“A single red apple with dew drops on a rustic wooden table, morning sunlight streaming from the left, soft shadows, shallow depth of field, photorealistic style.”
- Prompt C (creative / stylized):
“A surreal floating red apple, surrounded by golden butterflies, in a dreamy fantasy forest, pastel palette, watercolor illustration style.”
- Variation prompt (tweak):
“Recreate version B, but with a dark moody background and dramatic contrast, emphasizing the reflections on the apple.”
6. Post-processing: polishing the result
Often, AI output is a strong base rather than a final product. Ways to polish:
- Adjust contrast, colors, and sharpness in editing software.
- Crop or reframe for focus.
- Combine elements from multiple outputs.
- Use upscaling tools to improve resolution.
Quick checklist for success
- ✅ Know your subject, mood, and style
- ✅ Use structured, detailed prompts
- ✅ Limit conflicting keywords
- ✅ Iterate and refine
- ✅ Use Copilot’s built-in options
- ✅ Post-process for polish
- ✅ Stay mindful of ethics and rights
Extra posts:
 From Chaos to Clarity Governance Tips for Organizations Rolling Out Microsoft 365 Copilot
  Mastering GitHub Copilot: Tips, Shortcuts, and Prompts That Work
  Common Pitfalls in Software Architecture Design
  Turbocharge Your Coding Top GitHub Copilot Shortcuts and Productivity Tips for VS Code
  Top AI Photo Editing Tools to Transform Your Images in 2025
  The ‘Digital Twin’ Employee Creating Hyper-Personalized Copilot Prompts with Copilot Studio