
Microsoft Lists has quickly become a powerful tool for teams who want to organize, track, and collaborate on information in a structured way. While many users are comfortable with the basics—creating lists, applying filters, and sharing with teammates—there’s a whole world of advanced formatting and automation that can take your Lists experience to the next level.
In this post, we’ll explore how you can transform your Lists into interactive, visually engaging, and automated solutions using advanced JSON formatting and Power Automate.
Why Go Beyond the Basics?
At first glance, Microsoft Lists looks like a modernized SharePoint list with a friendly UI. But when you start leveraging advanced features like column formatting, list view customization, and workflow automation, you can:
- Improve clarity with intuitive visuals.
- Streamline repetitive tasks with automation.
- Create lightweight apps without writing complex code.
Advanced Formatting in Microsoft Lists
1. Column Formatting with JSON
Column formatting allows you to control how individual fields look. Instead of plain text or numbers, you can:
- Display progress bars for percentage fields.
- Show status indicators (green check, red warning, yellow info).
- Turn a hyperlink field into a styled button.
Example: A “Status” column can be formatted to display traffic light icons:
- 🟢 Completed
- 🟡 In Progress
- 🔴 Blocked
This helps teams quickly scan the list without reading every entry.
2. View Formatting for Full-List Customization
View formatting lets you control the layout of entire rows. You can:
- Highlight overdue tasks in red.
- Group related items visually.
- Create “card-style” views for project dashboards.
Combined with column formatting, view formatting transforms Lists from a static table into an interactive dashboard.
3. Custom Cards with Forms
When you open an item in Microsoft Lists, the default form can feel rigid. With advanced formatting, you can tailor forms to:
- Reorder fields for logical flow.
- Highlight key fields with conditional styling.
- Hide irrelevant data based on conditions (e.g., only show “Delivery Date” if “Order Status = Shipped”).
Automation with Power Automate
Formatting improves how data looks, but automation improves how data works. Microsoft Lists integrates seamlessly with Power Automate, allowing you to build workflows triggered by list actions.
1. Notifications and Approvals
- Send Teams or email notifications when a new item is created.
- Route an item for approval before it moves to the next stage.
2. Task and Reminder Automation
- Automatically create Planner tasks when a new project request is logged.
- Send reminders when due dates are approaching.
3. Integrating with External Systems
- Push list updates to a SharePoint site or database.
- Connect with third-party services like Salesforce or Jira.
With the right flows, your List becomes the central hub that communicates across your Microsoft 365 ecosystem.
Pro Tips for Power Users
- Combine Formatting + Automation
Use formatting to highlight overdue items and automation to notify responsible team members automatically. - Leverage Templates
Microsoft and the community provide JSON formatting samples and ready-to-use Power Automate flows—great starting points for customization. - Test in a Sandbox
Formatting mistakes can break the display, and automation errors may spam notifications. Always test in a non-production list first. - Keep Accessibility in Mind
Not all users will benefit from color-based indicators. Consider using icons or text labels alongside colors.
Microsoft Lists isn’t just for tracking simple data. With JSON formatting and Power Automate, you can create visually intuitive and automated workflows that save time, reduce errors, and empower collaboration.
Step-by-Step JSON Formatting Examples
1. Status Column with Traffic Lights
Let’s make a Status choice column visually pop with traffic-light icons.
Steps:
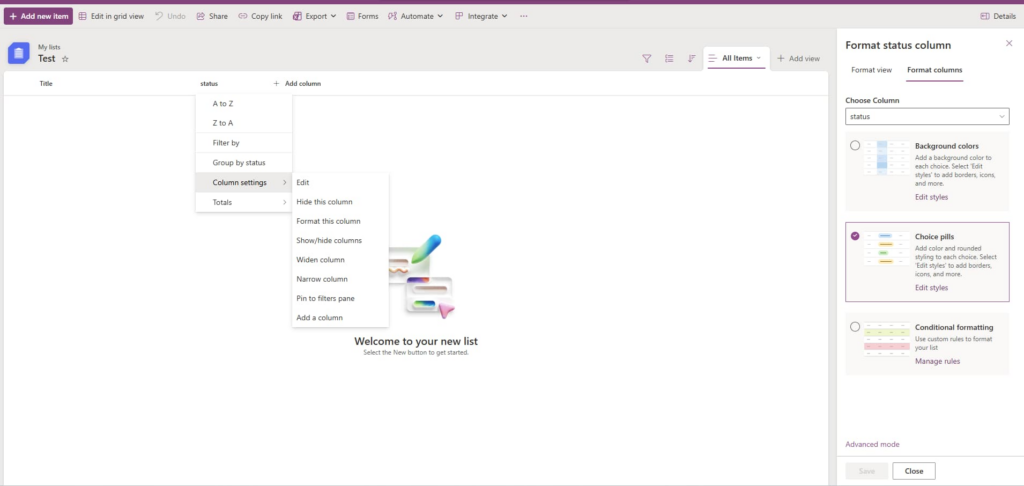
- Open your list.
- Go to Column settings > Format this column.
- Select Advanced mode.
- Paste the following JSON:
{
  "$schema": "https://developer.microsoft.com/json-schemas/sp/v2/column-formatting.schema.json",
  "elmType": "span",
  "attributes": {
    "iconName": "=if(@currentField == 'Completed','CheckMarkCircle',
                if(@currentField == 'In Progress','Clock',
                if(@currentField == 'Blocked','ErrorBadge','Circle')))"
  },
  "style": {
    "color": "=if(@currentField == 'Completed','green',
             if(@currentField == 'In Progress','orange',
             if(@currentField == 'Blocked','red','gray')))"
  },
  "children": [
    {
      "elmType": "span",
      "style": { "padding-left": "6px" },
      "txtContent": "@currentField"
    }
  ]
}
👉 Now your “Completed” items will show ✅ in green, “In Progress” will show 🕒 in orange, and “Blocked” will display a red warning.
2. Progress Bar for Percent Complete
Great for project tracking, this turns a Number column (0–100) into a progress bar.
Steps:
- Create a column called % Complete.
- Go to Format this column > Advanced mode.
- Paste this JSON:
{
  "$schema": "https://developer.microsoft.com/json-schemas/sp/v2/column-formatting.schema.json",
  "elmType": "div",
  "style": {
    "width": "100%",
    "height": "16px",
    "border": "1px solid #ccc",
    "border-radius": "8px",
    "overflow": "hidden"
  },
  "children": [
    {
      "elmType": "div",
      "style": {
        "background-color": "=if(@currentField < 50,'#f39c12',
                             if(@currentField < 100,'#3498db','#27ae60'))",
        "width": "=concat(@currentField,'%')",
        "height": "100%"
      }
    }
  ]
}
👉 Items will now display as colored bars: yellow for <50%, blue for <100%, and green for 100%.
3. Button to Open a Link
Turn a Hyperlink column into a clickable button for a cleaner UI.
Steps:
- Create a column called Resource Link.
- Format it with this JSON:
{
  "$schema": "https://developer.microsoft.com/json-schemas/sp/v2/column-formatting.schema.json",
  "elmType": "a",
  "style": {
    "display": "inline-block",
    "padding": "6px 12px",
    "background-color": "#0078d4",
    "color": "white",
    "border-radius": "4px",
    "text-decoration": "none"
  },
  "attributes": {
    "href": "@currentField",
    "target": "_blank"
  },
  "txtContent": "Open Resource"
}
👉 Instead of showing a plain URL, users see a blue button labeled Open Resource.
Putting It All Together with Automation
Once you’ve applied formatting:
- Use Power Automate to send Teams reminders when a “Blocked” status appears.
- Trigger emails when progress reaches 100%.
- Log button clicks by tracking when the link column is updated.
By combining formatting (visual cues) and automation (actions), your list becomes a true lightweight app.
Extra posts:
 Setting Up Conditional Formatting in Microsoft Lists
  Navigating Compliance with Confidence A Deep Dive into Microsoft Purview Compliance Portal
  How Microsoft Keeps Your Data Safe in the Cloud – A Deep Dive into Cloud Security Practices
  Unlocking Productivity A Deep Dive into Notepad and Copilot in Windows 11
  Advanced Excel Formulas for Business Analysis
 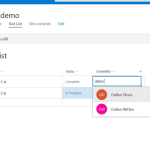 SharePoint Enhanced Quick Edit for lists and libraries