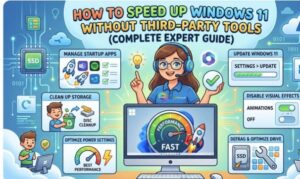
Windows 11 is designed to be fast, modern, and efficient. However, over time many users notice their system becoming slower apps take longer to open, startup times increase, and overall performance drops. The good news is that you don’t need third-party optimization tools to fix this. Windows 11 already includes powerful built-in features that can dramatically improve performance if used correctly.
As someone who has worked with Windows systems for years, I can confidently say that most slow Windows 11 PCs can be fixed using native system settings, built-in maintenance tools, and a few technical tweaks.
In this guide, I’ll walk you through practical, safe, and effective methods to speed up Windows 11 without installing any additional software.
Why Windows 11 Becomes Slow Over Time
Before optimizing your system, it helps to understand why performance declines.
Common causes include:
- Too many startup applications
- Background apps consuming memory
- Visual effects using GPU/CPU resources
- Temporary and junk system files
- Outdated drivers or Windows updates
- Fragmented or cluttered storage
- Insufficient virtual memory configuration
Fortunately, Windows 11 provides built-in tools to address all of these issues.
1. Disable Unnecessary Startup Programs
One of the biggest causes of slow Windows startup is too many applications launching automatically.
How to disable startup apps
- Press Ctrl + Shift + Esc to open Task Manager
- Click the Startup Apps tab
- Look for apps with High Startup Impact
- Right-click the app
- Select Disable
Recommended apps to disable (if unnecessary)
- Chat apps
- Game launchers
- Cloud tools you don’t actively use
- Auto-update utilities
⚠️ Avoid disabling security software or essential system tools.
Reducing startup apps can cut boot time by 30–60% on many systems.
2. Turn Off Unnecessary Visual Effects
Windows 11 includes animations, shadows, and transparency effects that look great but consume system resources.
Steps to disable visual effects
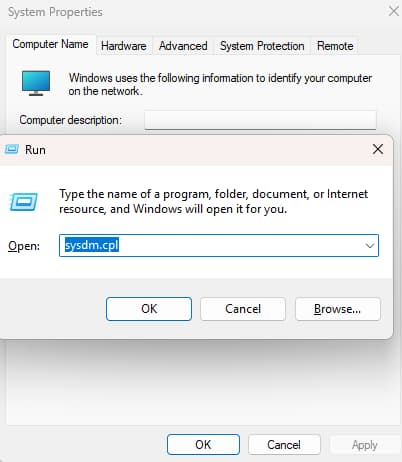
- Press Windows + R
- Type:
sysdm.cpl- Open the Advanced tab
- Under Performance, click Settings
- Select Adjust for best performance
This disables most animations.
Optional: Keep useful visuals
You can re-enable:
- Smooth edges of screen fonts
- Show thumbnails instead of icons
This balances performance with usability.
3. Clean Temporary and Junk Files
Temporary files accumulate quickly and waste storage space.
Method 1: Use Storage Sense
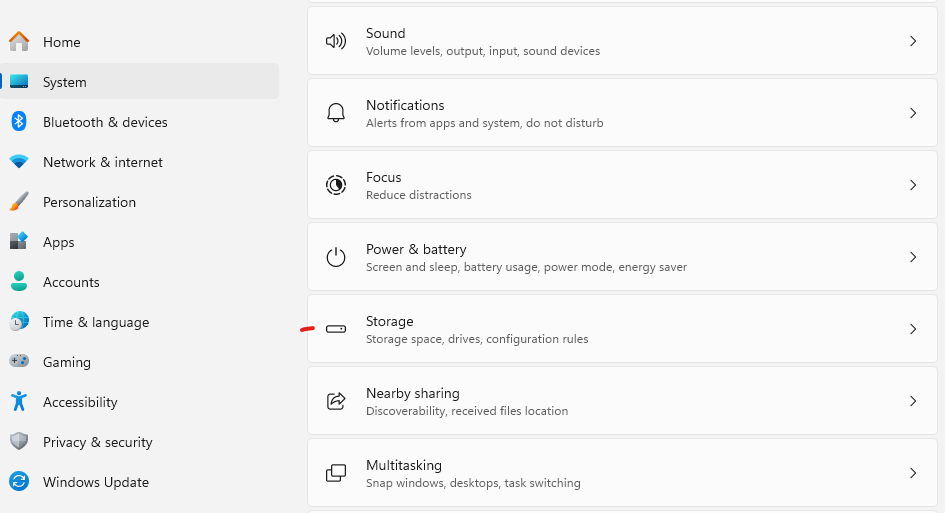
- Open Settings
- Go to System → Storage
- Click Temporary Files
- Select files to remove
- Click Remove Files
Method 2: Run Disk Cleanup
- Press Windows + S
- Search for Disk Cleanup
- Select your system drive (C:)
- Check items like:
- Temporary files
- Thumbnails
- Recycle Bin
- Windows Update Cleanup
- Click OK
Cleaning junk files can free several gigabytes of space and improve system responsiveness.
4. Stop Background Apps
Many apps continue running in the background even when you’re not using them.
How to disable background apps
- Open Settings
- Go to Apps → Installed Apps
- Click the three dots next to an app
- Select Advanced Options
- Under Background App Permissions, choose:
NeverThis prevents unnecessary CPU and RAM usage.
5. Optimize Your Drives
If you’re using an HDD (hard drive), fragmentation can slow down file access.
Run drive optimization
- Press Windows + S
- Search for:
Defragment and Optimize Drives- Select your drive
- Click Optimize
⚠️ Important:
- HDD → Defragmentation helps
- SSD → Windows performs TRIM optimization automatically
6. Update Windows and Drivers
Outdated system components can cause slowdowns and compatibility issues.
Update Windows
- Open Settings
- Go to Windows Update
- Click Check for Updates
Update drivers
- Right-click Start
- Open Device Manager
- Expand device categories
- Right-click device
- Select Update Driver
Keeping drivers updated ensures better hardware performance and stability.
7. Disable Transparency Effects
Transparency effects use GPU resources unnecessarily.
Turn them off
- Open Settings
- Go to Personalization → Colors
- Turn Transparency Effects → Off
This small change can help improve performance on lower-end PCs.
8. Adjust Power Settings for Maximum Performance
Windows may use balanced or power-saving modes that limit performance.
Enable High Performance Mode
- Press Windows + R
- Type:
powercfg.cpl- Select High Performance
If unavailable:
- Click Create a Power Plan
- Choose High Performance
This allows the CPU to run at higher performance levels.
9. Disable Unused Windows Features
Some Windows features run background services you may never use.
Turn off unused features
- Press Windows + R
- Type:
optionalfeatures- Disable features like:
- Internet Explorer Mode (if unused)
- Windows Fax and Scan
- Legacy Components
Be cautious and disable only features you recognize.
10. Restart Your PC Regularly
Many users rely on sleep or hibernate modes for weeks.
Restarting:
- Clears memory leaks
- Stops stuck processes
- Resets system services
Recommended
Restart your PC at least once every few days.
Bonus: Check for Malware Using Windows Security
Malware can significantly slow down Windows.
Run a full system scan
- Open Windows Security
- Go to Virus & Threat Protection
- Click Scan Options
- Select Full Scan
This ensures malicious programs are not consuming system resources.
Windows 11 performance issues are often caused by system clutter, background processes, and unnecessary startup programs rather than hardware limitations.
By using the built-in Windows tools and settings outlined above, you can:
- Reduce startup time
- Improve responsiveness
- Free up system resources
- Extend the life of your PC
Best of all, these optimizations are completely free and safe, requiring no third-party utilities.
If you make these adjustments regularly, your Windows 11 system will stay fast, stable, and efficient for years to come.
Extra posts:
 Complete Guide to Windows 11 Themes and Wallpapers
  Understanding the New Task Manager in Windows 11 (Complete Guide)
  How to Speed Up Boot Time in Windows 11
  The Complete Guide to Widgets in Windows 11
  How to Build and Save Your Own Theme Pack in Windows 11 A Complete Guide
  Managing App Permissions for Better Privacy in Windows 11 A Complete Guide