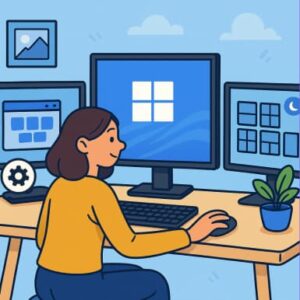
Setting up multiple monitors used to feel like something only tech enthusiasts or graphic designers needed. But today, whether you’re working from home, gaming, or juggling several projects at once, having more than one screen has become incredibly common — and honestly, incredibly helpful. Windows 11 makes using multiple monitors easier and more intuitive than ever, thanks to improved display controls, smarter window management, and automatic layout memory.
If you’ve recently added an extra screen (or several) to your setup and want to get the most out of them, this guide will walk you through everything you need to know. From basic setup to advanced features, here’s how to manage multiple monitors on Windows 11 like a pro.
Why Use Multiple Monitors?
Before we dive into the how-to, it’s worth appreciating why multi-monitor setups have become the new productivity norm:
- More screen space: No more constantly switching tabs or minimizing windows.
- Better multitasking: You can keep email or Slack open on one monitor while working on the other.
- Improved workflow: Great for video editing, coding, researching, gaming, and even day-to-day office work.
- Enhanced comfort: Reduces mental load and visual strain from juggling too many windows on one screen.
Now let’s get into the setup process.
1. Connecting Your Monitors
First things first — plug everything in.
- Turn off your PC (optional but recommended for first-time setup).
- Connect each monitor using HDMI, DisplayPort, USB-C, or VGA depending on what both your monitor and PC support.
- Turn on the monitors.
- Power on your computer.
Windows 11 should automatically detect each screen. If it doesn’t, don’t worry — there’s a manual method we’ll cover next.
2. Opening Display Settings
To access the main control center for your screens:
- Right-click anywhere on your desktop.
- Select Display settings.
Here, Windows will show a visual layout of your monitors labeled 1, 2, 3, etc.
3. Detecting Missing Displays
If Windows 11 didn’t pick up one of your monitors:
- Scroll down in Display settings.
- Click Multiple displays.
- Select Detect.
This usually solves the issue, but if not, you may need to check cables, try a different port, or update your graphics drivers.
4. Rearranging Your Displays
This is one of the most important steps for a seamless multi-monitor experience.
In Display settings, you’ll see your monitors represented as boxes. Simply drag and place them to match their physical arrangement on your desk — side-by-side, stacked vertically, or offset.
For example:
- If your second monitor is physically to the right, drag it to the right.
- If it’s above your laptop screen, drag it upward.
This ensures your mouse transitions naturally between screens.
5. Choosing Your Main Display
Your main display is where your Start menu, taskbar icons, and most apps will open by default.
To set it:
- Click the monitor you want as primary.
- Scroll down and check Make this my main display.
6. Adjusting Resolution and Scaling
Different monitors may have different resolutions or sizes, so it’s important they look consistent.
In Display settings:
- Select a monitor.
- Under Scale & Layout, adjust:
- Display resolution (Windows usually recommends the best one)
- Scale (100%, 125%, 150% depending on screen size)
For example, a 4K monitor may need 150% scaling to prevent text from looking tiny.
7. Choosing Display Modes
Windows 11 supports several viewing modes:
Extend
- The most common.
- Turns each monitor into additional workspace.
Duplicate
- Shows the same content on all screens.
- Useful for presentations or teaching.
Second screen only
- Turns off your main display and uses only the external one.
You can change modes by pressing Windows + P — a quick and handy shortcut.
8. Customizing the Taskbar for Multiple Monitors
Windows 11 gives you several taskbar layouts across monitors.
Go to:
Settings → Personalization → Taskbar → Taskbar behaviors
Here you can choose:
- Whether the taskbar appears on all screens.
- Whether each taskbar only shows the apps open on that display.
A cleaner setup is having the taskbar only show window icons for the monitor you’re actively using.
9. Snap Layouts and Snap Groups
One of Windows 11’s biggest improvements is its window snapping experience — a huge win for multi-monitor users.
Snap Layouts
Hover over the maximize button on any window to see snapping options such as:
- Side-by-side
- Quadrant layout
- Large zone with secondary small zones
Snap Groups
Windows remembers how you arranged windows across screens. If you unplug a monitor and plug it back later, your layout automatically returns.
10. Using Keyboard Shortcuts
These shortcuts make managing multiple monitors much faster:
- Win + P – Change display mode
- Win + Arrow keys – Snap windows
- Shift + Win + Arrow keys – Move windows between monitors
- Win + Tab – Task view
Learning just a couple of these can dramatically speed up your workflow.
11. Display Color Calibration
If your monitors look slightly different in color, brightness, or contrast, you can calibrate them:
- In Display settings, choose Advanced display.
- Select Calibrate display.
This helps when doing design or video work where color consistency matters.
12. Troubleshooting Common Issues
Here are a few quick fixes for common multi-monitor problems:
Monitor not detected
- Check cables and power.
- Try another port.
- Update GPU drivers.
Incorrect resolution
- Set the recommended resolution manually.
Cursor stuck or doesn’t move correctly
- Rearrange displays in Settings to match your desk setup.
Apps opening on the wrong monitor
- Move the app to the monitor you want.
- Close it.
- Reopen — Windows remembers its last position.
Managing multiple monitors on Windows 11 is easier than ever thanks to smart features like Snap Layouts, automatic window memory, and intuitive display settings. Whether you’re working, gaming, or just trying to stay organized, a well-configured multi-monitor setup can dramatically boost your productivity and comfort.
With just a few adjustments, you can create a workspace that feels natural, efficient, and tailored to the way you work.
Extra posts:
 How to Clean Install Windows 11 — Step-by-Step (The Friendly, No-Nonsense Guide)
  The Complete Guide to Widgets in Windows 11
  Complete Guide to Windows 11 Themes and Wallpapers
  How to Build and Save Your Own Theme Pack in Windows 11 A Complete Guide
  Managing App Permissions for Better Privacy in Windows 11 A Complete Guide
  Setting Up Ransomware Protection in Windows 11 – A Simple and Complete Guide