If you work in an office environment, collaborate with a team, or simply want a convenient way to access files stored on another computer or NAS device in your home, mapping a network drive is one of the most useful features in Windows 11. It creates a shortcut to a shared folder on another device, allowing you to open, edit, and manage files just like you would with local storage. Despite being incredibly helpful, many Windows users don’t realize how simple and powerful this feature is.
In this guide, you’ll learn exactly how to map network drives in Windows 11, along with tips, troubleshooting advice, and alternate methods—including command-line options for IT professionals.
What Does It Mean to Map a Network Drive?
Mapping a network drive means assigning a drive letter (such as Z: or H:) to a shared folder on another computer, server, or network-attached storage device. Once mapped, the shared folder behaves as though it’s part of your computer’s hard drive.
You can:
- Open files directly from the shared location
- Save documents to it from any Windows application
- Use it just like any other drive inside File Explorer
This is especially useful if you frequently access shared resources, want to centralize team files, or need to streamline your workflow.
Before You Begin: Requirements for Mapping a Network Drive
Before mapping a drive, make sure:
- The folder you want to access is shared on another computer or server.
- You know the network path of the shared folder (e.g.,
\\ComputerName\SharedFolder). - The devices are on the same network.
- You have the correct permissions to access the shared folder.
- Optional: You may need a username and password if the shared folder requires authentication.
Once you’ve confirmed these basics, you’re ready to map.
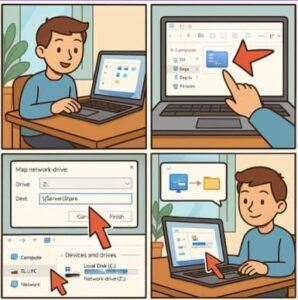
Method 1: How to Map a Network Drive Using File Explorer (Recommended)
This is the easiest and most common method, suitable for most users.
Step 1: Open File Explorer
You can open File Explorer by clicking the folder icon in your taskbar or pressing Windows + E.
Step 2: Choose “This PC”
In the left-hand navigation panel, select This PC. This ensures you’re working in the correct view.
Step 3: Click “Map Network Drive”
At the top of the window, select the See more (…) menu if the toolbar is collapsed, then choose:
More > Map network drive
This opens the mapping wizard.
Step 4: Choose a Drive Letter
Windows will give you a list of unused letters. Pick any letter you prefer—some organizations use certain letters for standard network locations (for example, “H:” for home folder).
Step 5: Enter the Network Path
In the “Folder” field, type the location of the shared folder:
\\ComputerName\SharedFolder
You can also click Browse if the folder is discoverable on the network.
Step 6: Choose Login Options
You’ll see two important checkboxes:
- Reconnect at sign-in – Keeps the drive mapped every time you log into Windows
- Connect using different credentials – Use this if the folder requires a separate username and password
Check them if needed.
Step 7: Click “Finish”
If credentials are required, Windows will ask for them. Once complete, your new network drive will appear under “This PC” and can be used like any other drive.
Method 2: Map a Network Drive Using Settings
Windows 11 also lets you map drives from the Settings app.
- Open Settings
- Go to System > Storage
- Select Advanced storage settings
- Click Network locations
- Choose Add a network location
Follow the prompts to assign a drive letter and enter your folder path.
While this method works, most users prefer File Explorer because it’s faster and more intuitive.
Method 3: Map a Network Drive Using Command Prompt
If you prefer the command line—or you’re writing deployment scripts—you can use the net use command.
Basic Command:
net use Z: \\ComputerName\SharedFolder
With Username and Password:
net use Z: \\ComputerName\SharedFolder /user:Username Password
Persistent Mapping:
net use Z: \\ComputerName\SharedFolder /persistent:yes
This tells Windows to reconnect the drive every time you log in.
Method 4: Use PowerShell to Map a Drive
PowerShell offers another fast and powerful way to map drives.
PowerShell Command:
New-PSDrive -Name "Z" -PSProvider FileSystem -Root "\\ComputerName\SharedFolder" -Persist
This is especially helpful for administrators managing multiple systems.
Troubleshooting Common Network Drive Issues
Even though mapping drives is simple, you may occasionally run into issues. Here’s how to fix the most common ones:
1. “Network Path Not Found”
- Make sure the remote device is turned on
- Ensure both devices are on the same network
- Verify that file sharing is enabled on the host computer
2. Permission Denied
- Confirm your account has permission to access the shared folder
- Try connecting using different credentials
3. Drive Disconnects After Restart
Enable Reconnect at sign-in or use the /persistent:yes option in command line.
4. Windows Credentials Not Saving
Open the Credential Manager and manually add the username and password for the network location.
Mapping a network drive in Windows 11 is one of the easiest ways to streamline file access, especially if you frequently collaborate or manage shared resources. Whether you choose the simple File Explorer method or prefer the power of command-line tools, Windows gives you plenty of flexibility to create reliable and persistent connections to shared folder locations.
By understanding how to map network drives effectively—and how to fix common issues—you ensure a smooth and efficient workflow across your entire network.
Extra posts:
 Customizing the Lock Screen in Windows 11 A Step-by-Step Guide to Personalize and Optimize
  How to Clean Install Windows 11 — Step-by-Step (The Friendly, No-Nonsense Guide)
  Setting Up Windows Hello Face and Fingerprint Sign-In A Step-by-Step Guide
  How to Change Taskbar Position and Icons in Windows 11 (Step-by-Step Guide)
  The Complete Guide to Widgets in Windows 11