Windows 11 is here, offering a refreshed design, enhanced security, and improved performance. If you’re still using Windows 10, you might be wondering how to upgrade without any additional cost. Fortunately, Microsoft provides a free upgrade path for eligible devices. In this blog, we’ll guide you through the migration process, ensuring a smooth transition from Windows 10 to Windows 11.
Why Upgrade to Windows 11?
Before diving into the upgrade process, let’s explore some key benefits of Windows 11:
- Modern UI and Design: A fresh, centered Start menu, rounded corners, and improved animations.
- Performance Improvements: Faster boot times, better memory management, and enhanced multitasking features like Snap Layouts.
- Security Enhancements: Windows 11 comes with built-in security features such as TPM 2.0, Secure Boot, and enhanced Windows Defender.
- Gaming Upgrades: Auto HDR, DirectStorage, and better support for gaming on high-performance hardware.
- Better Virtual Desktop and Touchscreen Experience: Optimized for productivity, especially on hybrid devices.
Step 1: Check System Requirements
Microsoft has set specific hardware requirements for Windows 11. Before upgrading, ensure your device meets these specifications:
- Processor: 1 GHz or faster with at least 2 cores (64-bit compatible).
- RAM: Minimum 4GB.
- Storage: At least 64GB of free space.
- TPM 2.0 and Secure Boot: Required for security enhancements.
- Graphics Card: DirectX 12 compatible.
- Display: High-definition (720p) display greater than 9 inches.
How to Check Compatibility?
You can use Microsoft’s PC Health Check Tool to verify if your system is compatible:
- Download the PC Health Check Tool from Microsoft’s website.
- Install and run the tool.
- It will provide a detailed report on whether your PC can run Windows 11.
Step 2: Backup Your Data
While upgrading doesn’t usually erase your files, it’s always good practice to back up important data. You can use:
- OneDrive: Cloud storage for syncing your files.
- External Drive: Copy important documents, photos, and videos.
- Windows Backup Tool: Create a system image for complete recovery.
Step 3: Upgrade to Windows 11 for Free
If your PC meets the system requirements, follow these steps to upgrade:
Method 1: Windows Update (Recommended)
- Open Settings in Windows 10.
- Go to Update & Security > Windows Update.
- Click Check for updates.
- If Windows 11 is available, click Download and Install.
- Follow the on-screen instructions and restart when prompted.
Method 2: Using the Installation Assistant
If Windows 11 isn’t appearing in Windows Update, try the Windows 11 Installation Assistant:
- Download the tool from Microsoft’s official website.
- Run the installer and follow the instructions.
- The tool will handle the upgrade without affecting your files.
Method 3: Clean Installation (For a Fresh Start)
If you prefer a fresh installation:
- Download the Windows 11 Media Creation Tool.
- Create a bootable USB drive.
- Boot from the USB and follow the installation steps.
- Select Custom Install to format the drive for a clean setup.
Step 4: Post-Upgrade Checklist
After installing Windows 11, follow these steps:
- Update Drivers: Visit the manufacturer’s website for the latest drivers.
- Check for Updates: Go to Settings > Windows Update to install any pending updates.
- Restore Files (if needed): If you performed a clean install, copy back your files.
- Personalize Settings: Adjust themes, layouts, and preferences to suit your workflow.
Troubleshooting Common Issues
Here are solutions to some common upgrade problems:
- Windows 11 not appearing in Windows Update: Use the Installation Assistant instead.
- Compatibility Issues: If your PC doesn’t meet TPM 2.0 or Secure Boot requirements, check if they are enabled in BIOS.
- Low Storage Space: Free up space using Disk Cleanup or an external driv
Extra posts:
 Free from Microsoft Azure webinar series Migrate to Windows Virtual Desktop on Azure Free Webinar from Microsoft Migrate Your Workloads to Azure Managed Disks
 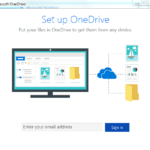 OneDrive free Space feature in Office 365 and Windows 10
  Free Up Disk Space with Storage Sense & Disk Cleanup in Windows 11 A Complete Guide
  How to Migrate from Facebook Workplace to Microsoft Viva
  How to Migrate Legacy Applications Using GitHub Copilot