Upgrading to a new Windows 11 PC is exciting — faster performance, smoother design, and enhanced security features. But before you can fully enjoy your new setup, you’ll likely want to bring over your files, apps, and settings from your old computer. Fortunately, transferring data to a Windows 11 machine is easier than ever.
In this guide, we’ll walk through several effective ways to move your files and apps — from built-in Windows tools to third-party solutions — so you can get started quickly and seamlessly.
1. Prepare for the Transfer
Before transferring anything, take a few minutes to get organized:
- Back up your data. Create a backup using an external drive or a cloud service (OneDrive, Google Drive, etc.) to protect against data loss.
- Check Windows updates. Make sure both your old PC and new PC are running the latest versions of Windows.
- Clean up unnecessary files. Delete old downloads and temporary files to streamline the transfer process.
2. Use OneDrive for Cloud-Based Transfer
If you’ve been using a Microsoft account, OneDrive is the easiest way to transfer files between PCs.
Steps:
- On your old PC, open OneDrive and sign in with your Microsoft account.
- Drag your important folders (Documents, Pictures, Desktop, etc.) into the OneDrive folder.
- On your new Windows 11 PC, sign in with the same account.
- Your files will automatically sync to the new device.
Pro Tip: You can also enable Folder Backup in OneDrive settings to automatically sync Desktop, Documents, and Pictures folders.
3. Use an External Hard Drive or USB Drive
If you prefer a manual transfer or have a large amount of data, an external drive is a reliable option.
Steps:
- Connect the drive to your old PC.
- Copy the files and folders you want to transfer.
- Safely eject the drive and plug it into your new Windows 11 PC.
- Paste the files into the appropriate folders.
Tip: Organize files into categories (e.g., Work, Photos, Music) before copying to save time later.
4. Use Windows Backup and Restore
For a more comprehensive migration, you can use Backup and Restore (Windows 7), which is still available in Windows 10 and 11.
Steps:
- On your old PC, go to Control Panel → Backup and Restore (Windows 7).
- Create a backup and save it to an external drive.
- On your Windows 11 PC, open the same tool and select Restore my files.
This method allows you to restore user files and some settings, but not installed apps.
5. Transfer Apps and Settings
Moving installed programs and settings can be tricky since most apps need to be reinstalled on your new PC. However, you can simplify this with tools like:
- PCmover by Laplink: Officially recommended by Microsoft, it can move applications, files, and settings automatically.
- EaseUS Todo PCTrans: Transfers selected apps and data between PCs via network or image files.
Note: Always reinstall security or system-critical apps manually to ensure proper configuration.
6. Use Nearby Sharing for Small Transfers
If both PCs are on the same Wi-Fi network, Windows 11’s Nearby Sharing is a convenient feature.
Steps:
- On both PCs, go to Settings → System → Nearby sharing and turn it on.
- Right-click a file → Share → Nearby sharing → Choose your new PC.
- Accept the transfer on your Windows 11 PC.
This is ideal for smaller files or quick transfers, not for entire backups.
7. Double-Check After the Move
After transferring your data:
- Verify all important files are accessible.
- Reinstall key applications.
- Sign in to your Microsoft, Adobe, and other service accounts.
- Set up your preferred settings and personalization options.
Migrating to Windows 11 doesn’t have to be a hassle. Whether you use OneDrive, a physical drive, or software tools like PCmover, you can easily bring your digital life with you.
By planning ahead and choosing the right method for your needs, your transition to Windows 11 will be smooth, safe, and stress-free.
Extra posts:
 Upgrading Your Laptop? Here’s How to Transfer Everything to Windows 11 Easily
 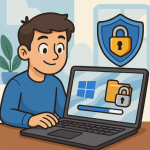 Using BitLocker to Encrypt Your Files in Windows 11
 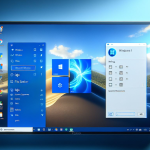 Recover Deleted Files with Windows File Recovery A Lifesaver from Microsoft
  Recovering Deleted Files Using Windows File Recovery A Complete Guide
  Microsoft 365 Companion Apps for Windows 11 A New Way to Stay Productive
  Comparing Microsoft 365 Apps for Windows, Mac, and Web: Which One Is Right for You?