
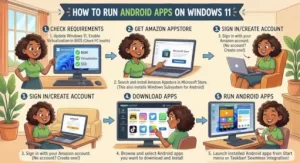
Running an Android app on a Windows 11 PC sounds like it should be straightforward. After all, Windows 11 once offered native Android app support through Microsoft’s Windows Subsystem for Android (WSA).
There is a catch: WSA is no longer a supported installation path for new Windows 11 users. Microsoft ended availability of Windows Subsystem for Android and the Amazon Appstore in the Microsoft Store on March 5, 2025.
That changes the answer to the question “How do I run Android apps on Windows 11?”
For most users, the practical choices today are an Android emulator, the Android Studio Emulator for development and testing, or Google Play Games on PC when the goal is specifically to play supported Android games.
Here’s how each option works and when to use it.
What happened to Android apps on Windows 11?
Microsoft originally integrated Android application support into Windows 11 through WSA. The subsystem provided an Android environment that could run alongside normal Windows applications, while the Amazon Appstore provided the supported app catalog. Microsoft documentation also listed requirements such as Windows 11, an x64 or ARM64 processor, SSD storage, and Virtual Machine Platform.
That approach has now been retired.
Microsoft’s current support documentation explicitly states that Windows Subsystem for Android and the Amazon Appstore are not available in the Microsoft Store starting March 5, 2025.
This is an important distinction for IT teams. You may still find old tutorials explaining how to enable WSA, install the Amazon Appstore, or sideload APK files into WSA. Those instructions describe a legacy setup rather than a current, supported Windows 11 deployment strategy.
So, rather than trying to resurrect WSA, choose the Android runtime that matches your workload.
Option 1: Use an Android emulator
For general Android application use, an Android emulator is the most flexible approach.
An emulator creates a virtual Android environment inside Windows. Depending on the product, you can install applications through an integrated app store, install APK packages, configure virtual devices, and interact with Android using your keyboard and mouse.
The basic workflow is:
- Choose a reputable Android emulator.
- Download the installer from the vendor’s official website.
- Install the emulator on Windows 11.
- Enable hardware virtualization if the emulator requires it.
- Create or start an Android virtual device.
- Install the application through the emulator’s supported app marketplace or APK installation mechanism.
- Configure keyboard, display, storage, and performance settings as needed.
Hardware virtualization matters because Android emulators rely heavily on CPU virtualization to avoid the performance penalty associated with purely software-based emulation.
Before deploying an emulator across multiple business PCs, IT administrators should also check licensing, application compatibility, security controls, update policies, and whether the emulator works correctly with Windows virtualization features.
Option 2: Use Android Studio for development and testing
If you’re an Android developer, QA engineer, or IT professional testing an internal application, Android Studio’s Emulator is usually a better fit than a consumer-focused emulator.
The Android Emulator lets you create virtual Android devices with different operating-system versions, screen sizes, hardware configurations, and other characteristics.
A typical development workflow looks like this:
- Install Android Studio.
- Open the Device Manager.
- Create an Android Virtual Device (AVD).
- Select an appropriate device profile and Android system image.
- Start the virtual device.
- Deploy your application from Android Studio.
- Test functionality, layouts, permissions, orientation changes, and other device-specific behavior.
This approach is particularly useful when you need repeatable test environments. For example, a QA team can maintain several virtual devices representing different Android configurations instead of keeping a physical handset for every test case.
It also makes debugging considerably easier because the emulator integrates directly with Android development tools.
For organizations, the key advantage is control. You can build test configurations around the application’s requirements rather than simply installing an Android environment for casual use.
Option 3: Use Google Play Games on PC for Android games
If your goal is gaming rather than running arbitrary Android applications, Google Play Games on PC is a separate option worth considering.
Google provides a Windows application specifically for playing supported mobile games on a PC. It supports keyboard and mouse controls, synchronizes supported game progress, and provides compatibility information for games in its catalog.
Google’s current requirements include:
- Windows 10 version 2004 or later
- At least 8 GB of RAM
- An SSD with at least 10 GB of available storage
- A compatible processor
- Hardware virtualization enabled
- A Windows administrator account
Google also notes that some installations may require Windows Hypervisor Platform to be enabled.
Not every Android game is automatically supported. Google categorizes games based on their Windows compatibility, including labels such as Optimized and Playable. A “Playable” game, for example, has been tested for stability and is expected to run at 30 frames per second or higher while supporting mouse and/or keyboard input.
This makes Google Play Games a better match for gaming than trying to install a general-purpose Android environment simply to launch a game.
What about installing an APK directly?
An APK is Android’s application package format. On Android itself, installing an APK can be straightforward when the device permits installation from the relevant source.
Windows 11, however, does not natively execute APK files as ordinary Windows applications.
You therefore need an Android runtime capable of installing and running the APK. That could be an Android emulator or another Android virtualization solution that explicitly supports APK installation.
For IT departments, APK sourcing deserves particular attention. Avoid downloading application packages from random APK repositories simply because they are convenient. An APK can contain modified code, unwanted components, or an outdated application version.
For internal applications, obtain packages from the development team or your organization’s controlled distribution process whenever possible.
Check virtualization before troubleshooting performance
Many Android-on-Windows problems are actually virtualization problems.
If an emulator is slow, refuses to start, or reports that acceleration is unavailable, check whether hardware virtualization is enabled in the PC’s firmware and whether the Windows virtualization components required by your chosen solution are enabled.
Google’s own PC gaming documentation, for example, notes that CPU virtualization may need to be enabled in BIOS settings and that Windows Hypervisor Platform can be required during installation.
Also check:
- CPU utilization
- Available RAM
- SSD capacity and free space
- GPU drivers
- Windows virtualization features
- Conflicts with other hypervisors or emulators
Don’t assume that adding more RAM will fix every emulator problem. CPU virtualization, GPU acceleration, storage performance, and the configuration of the virtual device can all affect responsiveness.
Which method should you use?
The right choice depends on what you’re trying to accomplish.
For ordinary Android app use: choose a reputable Android emulator that supports your required applications.
For Android development: use Android Studio’s Emulator. It provides the development and testing controls that professional workflows need.
For supported mobile games: use Google Play Games on PC when the game is available in its catalog.
For enterprise testing: consider Android Studio’s Emulator or a managed virtualization strategy that fits your organization’s security and deployment requirements.
For legacy WSA tutorials: treat them as historical documentation. Microsoft’s WSA/Amazon Appstore route is no longer available through the Microsoft Store.
Practical Takeaway: Pick the Android Runtime First
The biggest mistake is starting with an APK and asking how to open it on Windows. Start with the opposite question: what Android workload are you trying to run?
A consumer app, a corporate application, an automated test suite, and a mobile game can have very different requirements.
For general-purpose Android apps, look at a reputable emulator. For development and QA, Android Studio’s Emulator gives you much more control. For supported games, Google Play Games on PC provides a purpose-built Windows experience.
And if you encounter a guide telling you to install Windows Subsystem for Android from the Microsoft Store, check its publication date. Microsoft’s current documentation confirms that WSA and Amazon Appstore availability ended on March 5, 2025.
The practical next step is simple: identify the Android application you need to run, verify its compatibility with your chosen runtime, and then configure virtualization and hardware resources before troubleshooting individual apps.
Extra posts:
 How to Run Windows 11 Smoothly on a 5- or 7-Year-Old Laptop/PC
  How to Install Linux on a PC with Windows and Run Both Operating Systems
  Intel HAXM vs. Hyper-V/WHPX Choosing the Right Setup for Android Emulator on Windows
  How to Transfer Files and Apps from Old PC to Windows 11
  Syncing Your Android Phone with Windows 11 Using Phone Link
  How to Sync Your Android Phone with Windows 11 Using Phone Link