Virtual machines are a powerful way to run multiple operating systems, test software in isolated environments, and build lab setups without needing extra hardware. If you’re on Windows 11 Pro, Enterprise, or Education editions, you already have access to Hyper-V, Microsoft’s built-in virtualization platform.
In this guide, we’ll walk you through enabling Hyper-V and setting up your first virtual machine on Windows 11.
1. What is Hyper-V?
Hyper-V is Microsoft’s hypervisor technology that allows you to run multiple operating systems simultaneously on a single physical computer. Each VM has its own dedicated resources—CPU, RAM, storage, and networking—so you can safely experiment without affecting your main system.
2. System Requirements for Hyper-V on Windows 11
Before enabling Hyper-V, check that your system meets these requirements:
- Windows 11 Pro, Enterprise, or Education (not available in Home edition by default)
- 64-bit processor with Second Level Address Translation (SLAT)
- 4 GB RAM or more
- Hardware virtualization enabled in BIOS/UEFI (Intel VT-x or AMD-V)
👉 To check if virtualization is enabled:
Press Ctrl + Shift + Esc to open Task Manager → go to the Performance tab → check Virtualization status.
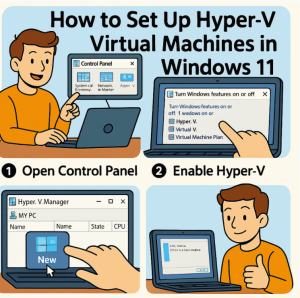
3. Enabling Hyper-V in Windows 11
There are two main ways to enable Hyper-V:
Method 1: Using Windows Features
- Press Win + R, type
optionalfeatures, and press Enter. - In the Windows Features dialog, check:
- Hyper-V Management Tools
- Hyper-V Platform
- Click OK and restart your PC.
Method 2: Using PowerShell
Run PowerShell as Administrator and enter:
Enable-WindowsOptionalFeature -Online -FeatureName Microsoft-Hyper-V -All
Restart your PC when prompted.
4. Opening Hyper-V Manager
After rebooting, search for Hyper-V Manager in the Start menu. This is your main console to create, configure, and manage virtual machines.
5. Creating Your First Virtual Machine
- In Hyper-V Manager, right-click your computer name → New → Virtual Machine.
- Follow the wizard:
- Name: Enter a VM name (e.g., “UbuntuTest” or “Windows10Lab”).
- Generation: Choose Generation 2 (recommended for modern OS) unless you need legacy support.
- Memory: Assign at least 2 GB (more for modern OSes).
- Networking: Select a virtual switch (create one if none exists).
- Virtual Hard Disk: Create a new disk or use an existing VHDX file.
- Installation Options: Choose to install from an ISO file or network.
- Finish the wizard, then start the VM from Hyper-V Manager.
6. Setting Up Networking (Optional but Recommended)
To give your VM internet access:
- Open Virtual Switch Manager in Hyper-V Manager.
- Create a New Virtual Network Switch → choose External to connect through your physical adapter.
- Assign this switch to your VM’s network configuration.
7. Installing the Guest OS
Once your VM boots from the ISO, proceed with the OS installation just as you would on a physical machine.
8. Tips for Better Performance
- Enable Dynamic Memory so Hyper-V adjusts RAM allocation automatically.
- Use Checkpoints to save snapshots before making big changes.
- Store VM files on a fast SSD for quicker load times.
Hyper-V in Windows 11 makes it easy to create and manage virtual machines without needing third-party tools. Whether you’re testing Linux, running older versions of Windows, or building a lab for IT experiments, Hyper-V provides a powerful and free solution built right into the OS.
Extra posts:
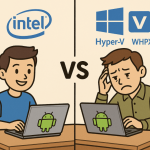 Intel HAXM vs. Hyper-V/WHPX Choosing the Right Setup for Android Emulator on Windows
 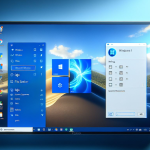 Windows 11 Setting Up Virtual Desktops for Better Multitasking
  How to enable Hyper V on Windows 10
  How to Use Hyper-V with BitLocker Without Constant Recovery Prompts
  Free from Microsoft Azure webinar series Migrate to Windows Virtual Desktop on Azure
  How to Move the Start Menu to the Left in Windows 11 (Like Windows 10 Style)