
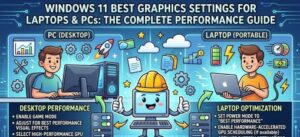
Windows 11 has become one of the most capable operating systems for gaming, creative work, and everyday productivity. Whether you own a powerful desktop gaming PC or a lightweight laptop, the right graphics settings can significantly improve performance, visual quality, and battery efficiency.
Many users assume buying a powerful graphics card is enough. In reality, Windows 11 includes several built-in graphics options that determine how efficiently your GPU performs. A few simple adjustments can increase frame rates, reduce input lag, improve application responsiveness, and even extend battery life on laptops.
In this guide, we’ll walk through the best Windows 11 graphics settings for laptops and PCs, explain what each option does, and help you decide which settings work best for your needs.
Why Graphics Settings Matter
Windows 11 manages both integrated and dedicated graphics processors. Without proper configuration, your system may not use the best GPU for demanding applications.
Optimizing graphics settings can help you:
- Increase gaming FPS
- Reduce stuttering and lag
- Improve video editing performance
- Speed up 3D rendering
- Save battery on laptops
- Reduce system overheating
- Enhance display quality
The good news is that most of these improvements require only a few minutes.
1. Turn On Hardware-Accelerated GPU Scheduling
One of the first settings worth checking is Hardware-Accelerated GPU Scheduling.
This feature reduces CPU overhead by allowing the graphics card to manage its own memory more efficiently.
How to Enable It
- Open Settings
- Select System
- Click Display
- Open Graphics
- Choose Default Graphics Settings
- Enable Hardware-Accelerated GPU Scheduling
- Restart your computer
Benefits
- Higher FPS in supported games
- Reduced input latency
- Better GPU utilization
- Smoother multitasking
2. Enable Game Mode
Windows 11 includes Game Mode, which prioritizes system resources for gaming.
When enabled, Windows reduces unnecessary background processes and allocates more CPU and GPU resources to your game.
Enable Game Mode
- Open Settings
- Go to Gaming
- Select Game Mode
- Turn it On
Game Mode is especially useful on mid-range gaming laptops where system resources are more limited.
3. Assign High Performance GPU to Games
Many laptops include both an integrated GPU and a dedicated graphics card.
Sometimes Windows launches games using the integrated GPU instead of the dedicated one.
To prevent this:
- Open Settings
- Navigate to System > Display > Graphics
- Add your game if it isn’t listed
- Click Options
- Select High Performance
- Save changes
This ensures your NVIDIA or AMD graphics card handles demanding applications.
4. Choose the Best Power Mode
Power settings directly affect graphics performance.
Desktop PCs
Choose:
Best Performance
This allows the processor and graphics card to operate without aggressive power-saving restrictions.
Laptops
If plugged in:
- Best Performance
If running on battery:
- Balanced
This helps maintain a good balance between battery life and graphics performance.
5. Adjust Visual Effects
Windows animations consume system resources.
Disabling unnecessary effects can improve responsiveness.
Steps
Search:
Adjust the appearance and performance of Windows
Then select:
Adjust for Best Performance
You can also manually enable:
- Smooth fonts
- Show thumbnails
- Window shadows
while disabling the rest.
This is particularly helpful for older laptops.
6. Enable Variable Refresh Rate (VRR)
If your monitor supports VRR, enabling it creates smoother gameplay with fewer screen tears.
Go to:
Settings → System → Display → Graphics → Default Graphics Settings
Enable:
Variable Refresh Rate
This is especially useful for FreeSync and G-SYNC compatible monitors.
7. Update Graphics Drivers
Even the best settings cannot compensate for outdated drivers.
Always install the latest drivers from your GPU manufacturer.
Benefits include:
- Better game compatibility
- Higher FPS
- Bug fixes
- Improved stability
- Support for new technologies
Updated drivers often provide noticeable performance improvements in newly released games.
8. Enable DirectX 12 Ultimate Features
Many modern GPUs support DirectX 12 Ultimate.
Games using DirectX 12 often provide:
- Better ray tracing
- Faster rendering
- Lower CPU usage
- Improved graphics quality
You can check support using the DirectX Diagnostic Tool (dxdiag).
9. Configure Graphics Preferences for Individual Apps
Windows 11 allows different graphics settings for each application.
For example:
- Photoshop → High Performance
- Premiere Pro → High Performance
- Chrome → Power Saving
- Microsoft Office → Power Saving
This optimizes resource usage while preserving battery life.
10. Optimize Display Resolution
Running games at native resolution provides the sharpest image.
However, lowering the resolution slightly can dramatically improve FPS.
Examples:
- 1920×1080
- 1600×900
- 1280×720
Lower resolutions require less GPU power, making them useful for older hardware.
11. Disable Background Applications
Background applications consume memory and CPU resources.
Before gaming:
- Close unnecessary browsers
- Exit Discord overlays if unused
- Disable startup applications
- Pause cloud syncing
This allows more resources for graphics-intensive tasks.
12. Enable Storage Sense
Although not directly related to graphics, maintaining free storage improves overall system responsiveness.
Enable Storage Sense to remove temporary files automatically.
A cleaner SSD often leads to smoother game loading times.
13. Turn Off Transparency Effects
Transparency effects add visual polish but require GPU resources.
Disable them:
Settings → Personalization → Colors
Turn off:
Transparency Effects
This small change can improve responsiveness on lower-end systems.
14. Configure NVIDIA or AMD Control Panel
Graphics manufacturers provide additional optimization tools.
NVIDIA Users
Recommended settings:
- Power Management Mode: Prefer Maximum Performance
- Low Latency Mode: Ultra
- Texture Filtering Quality: High Performance
- Vertical Sync: Use application setting
AMD Users
Recommended settings:
- Radeon Anti-Lag: Enabled
- Radeon Boost: Enabled
- Image Sharpening: Enabled
- Surface Format Optimization: Enabled
These settings can deliver extra performance without sacrificing too much image quality.
15. Enable Auto HDR (If Supported)
Windows 11 offers Auto HDR for compatible monitors and games.
Benefits include:
- Richer colors
- Better contrast
- Improved brightness
- More immersive gaming
Enable it through:
Settings → System → Display → HDR
Best Graphics Settings for Gaming
For the highest gaming performance, use this combination:
- Hardware-Accelerated GPU Scheduling: On
- Game Mode: On
- High Performance GPU: Enabled
- Best Performance Power Mode
- Latest GPU Drivers
- Variable Refresh Rate: On
- Auto HDR: On (if supported)
- Transparency Effects: Off
- Visual Effects: Best Performance
This setup works well for most gaming PCs and laptops.
Best Graphics Settings for Battery Life
If you’re using a laptop away from a charger, prioritize efficiency:
- Balanced Power Mode
- Power Saving GPU for everyday apps
- High Performance GPU only for games
- Variable Refresh Rate Off (if battery is critical)
- Lower screen brightness
- Lower display refresh rate when gaming isn’t required
These settings help extend battery life without making Windows feel sluggish.
Common Mistakes to Avoid
Many users accidentally reduce performance by:
- Ignoring GPU driver updates
- Using integrated graphics for games
- Running dozens of startup apps
- Installing unnecessary optimization software
- Keeping Windows outdated
- Using outdated graphics APIs
- Overusing RGB and overlay software
Avoiding these mistakes often delivers better results than tweaking advanced settings.

Windows 11 offers a wide range of graphics settings that can make a noticeable difference in gaming, creative workloads, and everyday performance. Whether you’re using a high-end desktop or an entry-level laptop, taking a few minutes to configure your system can lead to smoother gameplay, faster application performance, and better overall responsiveness.
Start by enabling Hardware-Accelerated GPU Scheduling, Game Mode, and High Performance GPU settings. Then, keep your graphics drivers updated, adjust visual effects to match your hardware, and configure power settings based on whether you’re aiming for maximum performance or longer battery life.
The ideal setup depends on your hardware and how you use your computer, but these recommendations provide a strong starting point for most Windows 11 users. With the right configuration, you can unlock better graphics performance without spending money on new hardware.
FAQ
Does Windows 11 improve gaming performance?
Yes. Windows 11 includes features like DirectStorage, Auto HDR, Hardware-Accelerated GPU Scheduling, and Game Mode that can improve gaming performance on supported hardware.
Which power mode is best for gaming?
The Best Performance power mode is recommended when your laptop is plugged in or if you’re using a desktop PC.
Should I enable Hardware-Accelerated GPU Scheduling?
Yes. Most modern NVIDIA, AMD, and Intel GPUs benefit from this feature, offering reduced latency and smoother performance.
Is Game Mode worth enabling?
Absolutely. It prioritizes system resources for games and minimizes background activity.
Can these settings improve FPS?
Yes. Combined, these optimizations can increase FPS, reduce stuttering, and improve overall gaming responsiveness, especially on mid-range systems.
Extra posts:
 Managing Bluetooth Devices and Settings in Windows 11: A Complete Guide
  How to Use Resource Monitor and Performance Monitor in Windows 11: A Complete Guide
  Windows 11 Slow? 15 Fixes to Boost Performance (Expert Guide)
  How to Optimize Battery Life on Windows 11 Laptops
  The Complete Guide to Widgets in Windows 11
  How to Secure Your Windows 11 PC (Complete Guide)