
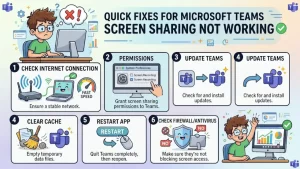
You click Share, select your screen, and… nothing happens. Maybe the sharing button is missing. Maybe Teams starts sharing and immediately stops. Or perhaps you can share a window, but the entire desktop refuses to appear.
When Teams screen sharing stops working, the problem isn’t always the Teams app itself. Meeting permissions, presenter roles, operating-system privacy controls, browser permissions, admin policies, and corrupted client data can all prevent screen sharing from working correctly.
The good news is that most issues can be isolated quickly if you troubleshoot them in the right order.
Here’s how to diagnose and fix Teams screen sharing not working, whether you’re using the Teams desktop app, browser, Windows, or macOS.
Start by Identifying What Is Actually Failing
Before changing settings, narrow down the symptom.
Ask:
- Is the Share button missing entirely?
- Can you see the Share button but cannot select your screen?
- Can you share a window but not your entire desktop?
- Does sharing start and then immediately stop?
- Can other people share their screens in the same meeting?
- Does screen sharing work in a different Teams meeting?
- Are you using the Teams desktop application or Teams on the web?
These questions matter because they point toward different causes.
For example, if everyone except one user can share content, investigate that user’s role, device permissions, or client configuration. If nobody in the meeting can share, the meeting or tenant policy is a much more likely culprit.
Microsoft Teams supports sharing an entire screen or an individual window from the meeting controls.
1. Check Whether You Have Permission to Present
One of the easiest explanations is also one of the most overlooked: your meeting role may not allow screen sharing.
Teams distinguishes between organizers, co-organizers, presenters, and attendees. Attendees have more restricted permissions, while organizers, co-organizers, and presenters can share content.
If you’re an attendee and the Share option isn’t available, ask the meeting organizer to check the meeting’s Who can present setting.
Depending on the meeting configuration, the organizer can allow:
- Everyone to present
- People in the organization and guests
- Only specific people
- Only organizers and co-organizers
Microsoft also allows administrators to define the default presenter policy through Teams admin center > Meetings > Meeting policies.
Quick test
Ask the organizer to make you a presenter and try sharing again.
If screen sharing immediately works, your device probably wasn’t the problem.
2. Check the Teams Meeting Policy
For IT administrators, this is one of the first places to investigate when multiple users report the same problem.
Teams has a Screen sharing mode policy that controls whether users can share their desktop or applications. The available modes include:
- EntireScreen — users can share their entire desktop or an application.
- SingleApplication — users can share an application.
- Disabled — screen and application sharing are disabled.
Microsoft documents this setting as a per-user meeting policy.
In the Teams admin center, check:
Meetings → Meeting policies → Content sharing → Screen sharing
You can also inspect the policy through PowerShell:
Get-CsTeamsMeetingPolicy -Identity "<policy name>"If the policy is intentionally restrictive, don’t change it simply to resolve one user’s issue. Confirm the organization’s security and compliance requirements first.
This is particularly important in managed environments where screen sharing may be deliberately restricted for sensitive meetings.
3. Check macOS Screen Recording Permissions
Mac users have another layer to consider: macOS privacy controls.
If you’re using Teams on a Mac and screen sharing doesn’t start, macOS may not have granted Teams permission to record the screen.
Go to:
Apple menu → System Settings → Privacy & Security → Screen & System Audio Recording
Make sure Microsoft Teams is enabled.
Then return to Teams and try sharing again.
Microsoft notes that Teams may prompt for screen-recording permission the first time you attempt to present. If you’re using Teams in a browser, the browser itself also needs the appropriate screen-recording permission.
If you’ve changed the permission, completely quit and relaunch Teams before testing again.
Mac users with docking stations
There is another potential complication for Mac users. Microsoft documents a known issue affecting sharing indicators and control panels when using DisplayLink or certain docking-station configurations on macOS 14 and later.
If screen sharing works when the Mac is disconnected from the dock but fails when the dock is connected, the docking configuration becomes an important troubleshooting clue.
4. Test Teams in a Supported Browser
If you’re using Teams on the web, browser permissions can interfere with device functionality.
Microsoft recommends checking browser permissions when Teams web features aren’t working correctly.
For screen sharing specifically, Microsoft currently documents screen sharing on Teams for the web using Google Chrome or the latest Microsoft Edge; Linux isn’t currently supported for this screen-sharing scenario.
A useful diagnostic test is simple:
- Open Teams in Chrome or Edge.
- Sign in with the same account.
- Join the same meeting.
- Try sharing your screen.
If sharing works in the browser but fails in the desktop application, you’ve narrowed the problem considerably. Focus on the desktop client, its permissions, or local application state rather than the meeting itself.
5. Restart Teams Before Doing Anything More Complicated
It sounds basic, but completely restarting Teams can resolve temporary client-state problems.
Don’t just close the meeting window. Quit Teams entirely and launch it again.
Then:
- Rejoin the meeting.
- Select Share.
- Try sharing an individual application first.
- If that works, test the entire screen.
Testing an application before the entire desktop is useful because it tells you whether the sharing mechanism works at all.
If application sharing works but desktop sharing doesn’t, investigate OS permissions and Teams sharing policies rather than repeatedly reinstalling the application.
6. Reset or Clear the Teams Client Cache
If permissions and meeting settings look correct, stale or corrupted local application data can be the next suspect.
Microsoft recommends clearing the Teams cache as a targeted troubleshooting step for certain local-client problems. It isn’t a universal fix, and Microsoft specifically cautions against using cache clearing as the first response to unrelated issues such as missing chat history.
For the new Teams on Windows, one supported approach is:
Settings → Apps → Installed apps → Microsoft Teams → Advanced options → Reset
Be aware that resetting the app deletes its local app data and personalization settings.
On macOS, Microsoft provides separate cache-removal procedures for both classic and new Teams.
After resetting or clearing the cache, restart Teams and test screen sharing again.
7. Check Whether the Problem Happens in Every Meeting
This is an important diagnostic step for support teams.
Try joining:
- A meeting organized by someone in your organization
- A meeting organized by an external organization
- A test meeting with a colleague
- A meeting from another device, if available
The pattern can reveal where the restriction exists.
If you can share in internal meetings but not external meetings, tenant or meeting-specific content-sharing policies may be involved. Microsoft provides administrators with policies that can restrict content sharing in external Teams meetings, including settings that limit sharing to trusted organizations and guests.
That means “screen sharing works sometimes” doesn’t necessarily indicate an unreliable device. The meeting context itself can change the permissions available to the user.
A Practical Troubleshooting Sequence for IT Teams
When supporting multiple users, avoid changing five settings at once. Use a controlled sequence:
- Confirm the symptom — missing Share button, failed share, black screen, or immediate disconnect.
- Check the meeting role — confirm the user is an organizer, co-organizer, or presenter.
- Test another meeting — determine whether the issue is meeting-specific.
- Test desktop versus web — use Chrome or Edge for a controlled browser test.
- Check OS permissions — especially Screen Recording on macOS.
- Check the Teams meeting policy — verify
ScreenSharingMode. - Restart Teams — eliminate temporary client-state problems.
- Reset or clear the client cache — only after simpler checks fail.
- Compare another device or account — isolate user, device, and tenant variables.
This sequence prevents a common support mistake: treating every Teams screen-sharing problem as an application bug.
When the Problem Is Probably an Admin or Tenant Issue
If several users suddenly lose screen-sharing functionality, don’t ask every employee to reinstall Teams.
Look for a common configuration change.
Review:
- Teams meeting policies
- Screen-sharing mode
- Who-can-present settings
- External meeting sharing restrictions
- Device-management policies
- Recent Teams or operating-system changes
- Whether the affected users share the same policy assignment
Microsoft’s Teams admin documentation specifically identifies meeting policies as the control point for content-sharing features such as screen sharing, PowerPoint sharing, and Whiteboard.
A policy-level issue can affect many users while leaving the Teams application itself perfectly healthy.
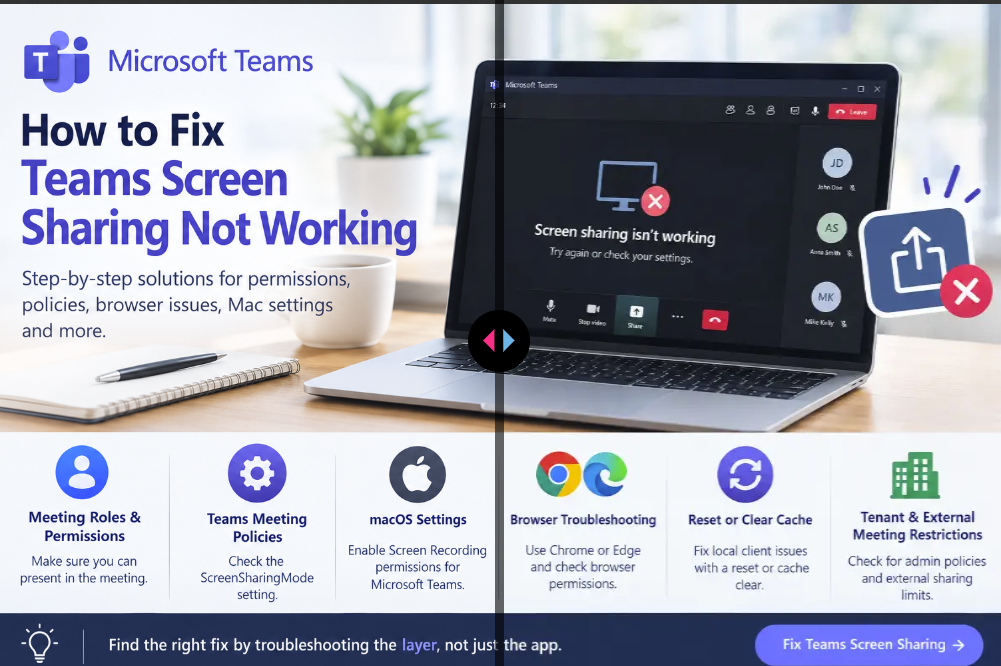
Practical Takeaway: Troubleshoot the Layer, Not Just the App
When Teams screen sharing is not working, resist the temptation to immediately reinstall Teams.
Start with the meeting.
Then check the user’s role, tenant policy, browser or desktop client, and operating-system permissions. For Mac users, Screen Recording permissions deserve particular attention. For IT administrators, the ScreenSharingMode meeting policy is an important checkpoint when the problem affects multiple users.
The fastest fix usually comes from identifying which layer is blocking screen sharing rather than repeatedly restarting the application.
Once you’ve isolated that layer, the solution is usually much more straightforward—and you can fix the underlying configuration instead of treating the symptom.
Extra posts:
 How to Fix Outlook Notifications Not Working: A Complete Troubleshooting Guide
  How to Fix Copilot When It Gives a Blank Screen
  How to Fix Windows 11 Black Screen After Login
  How to Fix Windows 11 Taskbar Not Working
  Why Is My Windows 11 Sandbox Not Working? 10 Ways to Fix It
  How to Fix Windows 11 No Sound or Audio Not Working